Installation einer Serverlizenz
Wibu CodeMeter-Installation
Nachdem die Wibu CodeMeter Runtime-Software heruntergeladen wurde, kann sie installiert werden. Eine einfache Standardinstallation ist hierbei ausreichend.
Stellen Sie lediglich sicher, dass die markierten Komponenten Network Server und Remote access to WebAdmin in der Installation enthalten sind.
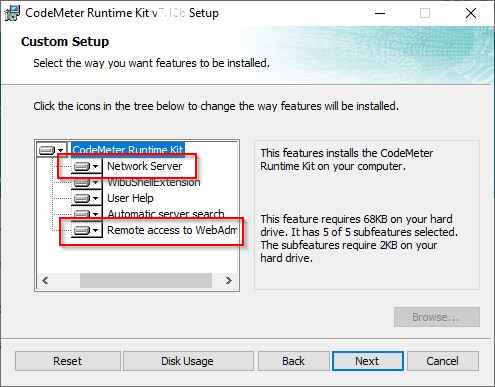
Ein Installationsleitfaden kann von der Wibu-Website heruntergeladen werden.

CodeMeter Installationsanleitung
Nach erfolgreicher Installation der Software erscheint das Symbol des CodeMeter Control Centers in der unteren rechten Ecke der Windows-Taskleiste auf Ihrem Hauptbildschirm.
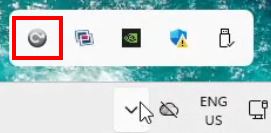
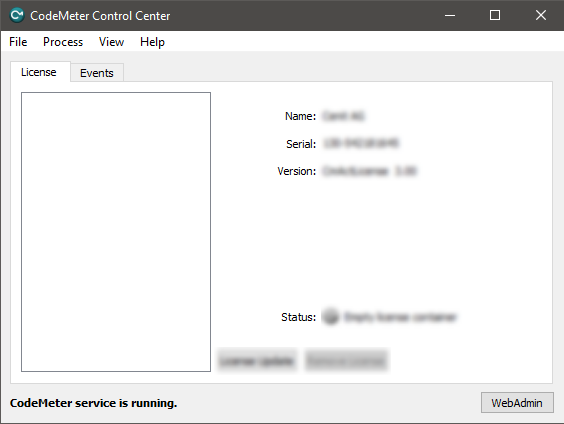
Das Control Center kann von hier oder über das Windows-Startmenü gestartet werden. Es öffnet sich mit einem Bedienfeld, das dem untenstehenden Bild ähnelt.
Lizenzvorbereitung
In case you have received a license dongle, plug the dongle into the USB port of the workstation. It will be pre-configured instantly and ready for use. The following steps in this paragraph can be skipped and you can continue with the License request and activation.
CodeMeter verwendet sogenannte Container; Pakete lizenzierter (Hersteller-)Produkte. Der FASTSUITE Container Cenit_AG.WibuCmLif muss vom Cenit-Download-Portal heruntergeladen werden, falls er nicht per E-Mail erhalten wurde.
Cenit-Download-Portal
Mit der heruntergeladenen Container-Datei kann die Lizenzvorbereitung gestartet werden.
Pick the file from the download location and drag it into the CodeMeter Control Center. Then drop it in the container area.
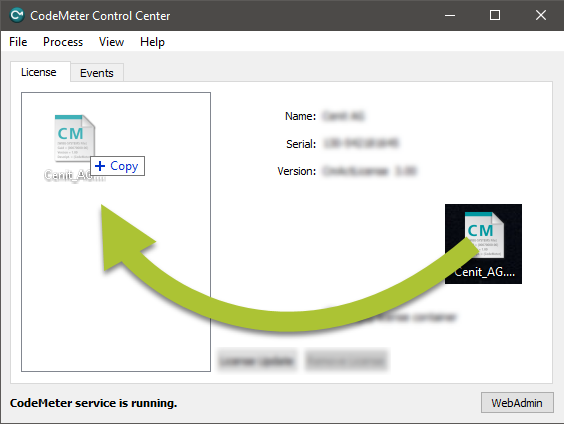
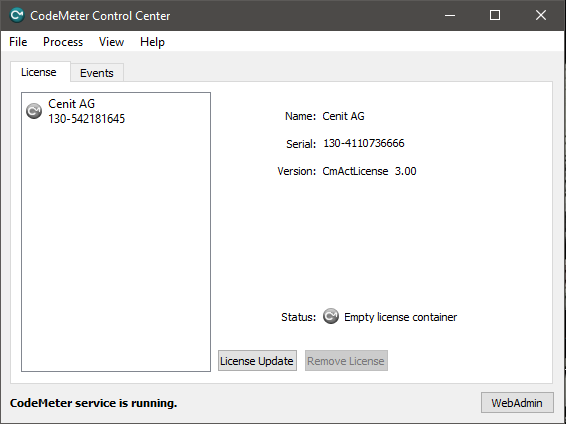
Der Container wird importiert. Bei Erfolg sollte das Ergebnis ähnlich wie im untenstehenden Bild aussehen.
Lizenzanforderung und Aktivierung
Mit dem erstellten Container kann die Lizenzinstallation gestartet werden. Gehen Sie zum FASTSUITE webdepot.
Cenit Webdepot
Dies öffnet die Anmeldeseite.
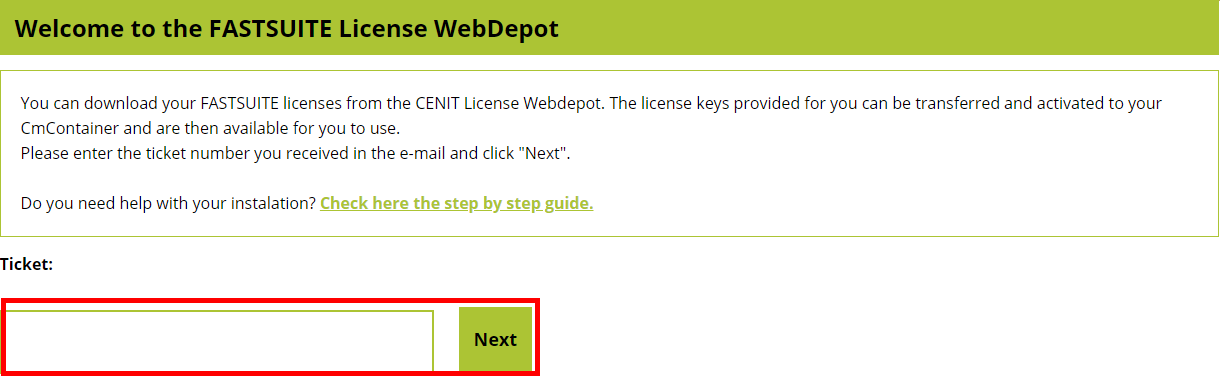
Geben Sie die per E-Mail erhaltene Ticketnummer ein und drücken Sie die Next-Taste, um fortzufahren. Es erscheint eine Liste aller Lizenzen, die in diesem Ticket enthalten sind, wie im folgenden Beispiel.

Drücken Sie die Activate licenses-Taste, um fortzufahren.
Auf der nächsten Seite muss ausgewählt werden, ob die Lizenz auf dem Dongle installiert werden soll, der an jedem Arbeitsplatz verwendet werden kann, oder ob Sie eine Lizenzdatei erhalten möchten, die auf einem dedizierten Arbeitsplatz installiert wird.
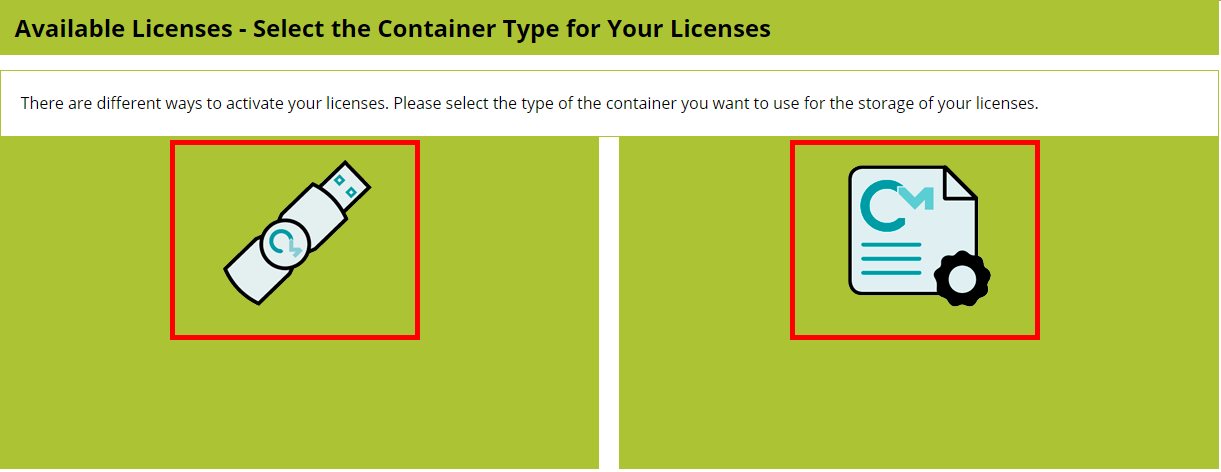
Drücken Sie die Taste, die dem von Ihnen benötigten Lizenztyp entspricht. Die folgenden Schritte sind dann für beide Typen identisch.
A) Online-Installation
Bei der Online-Installation, der Standardmethode des webdepot, wird die Lizenz automatisch installiert und aktiviert. Um die Online-Installation zu ermöglichen, muss überprüft werden, dass das webdepot als Trusted WebSocket Origin in der CodeMeter WebAdmin aufgeführt ist.
Im CodeMeter Control Center drücken Sie die WebAdmin-Taste. Dadurch wird die Verwaltung in Ihrem Standardbrowser geöffnet.

Gehen Sie zum Menü Konfiguration - Erweitert - Vertrauenswürdige WebSocket-Ursprünge.
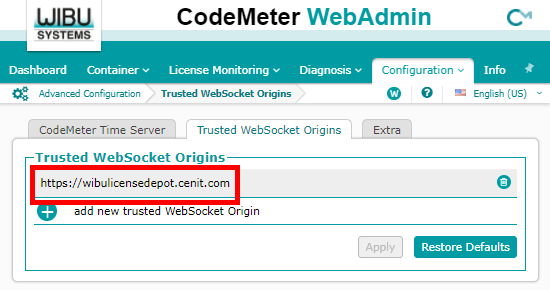
Prüfen Sie, ob die Adresse https://wibulicensedepot.cenit.com in der Liste der Trusted WebSocket ist.
Ursprünge. Wenn der Link zum Webdepot hier nicht aufgeführt ist, müssen Sie ihn hinzufügen, andernfalls ist die
Eine Online-Aktivierung ist nicht möglich.
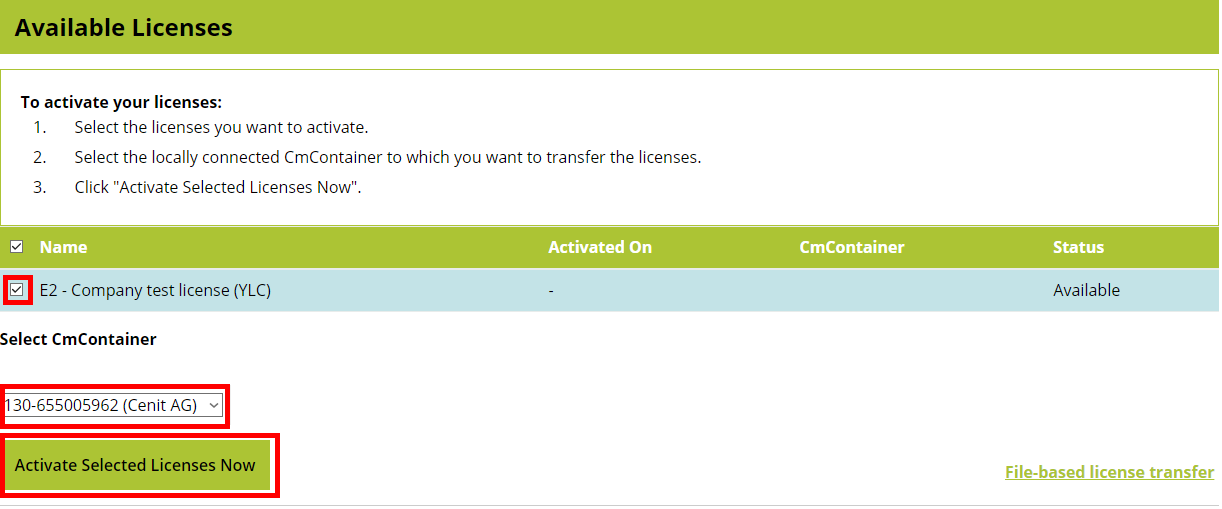
The webdepot returns an overview of available licenses. Then simply follow the instructions on the page.
B) Lizenzübertragung auf Datei-Basis
File based license transfer is an optional alternative to online installation. Use this workflow when the license activation needs to be performed manually by exchanging license files between CodeMeter and the CENIT WebDepot.
The file based license transfer consists of three actions:
- Create and upload a license request. — Generate the request file in CmFAS Assistant and upload it to the WebDepot.
- Download and import the license update. — Download the update from the WebDepot and import it into the CodeMeter container.
- Create and upload a receipt. — Create a receipt confirming the import and upload it to the WebDepot.
Create and upload a license request
To create a license request:
-
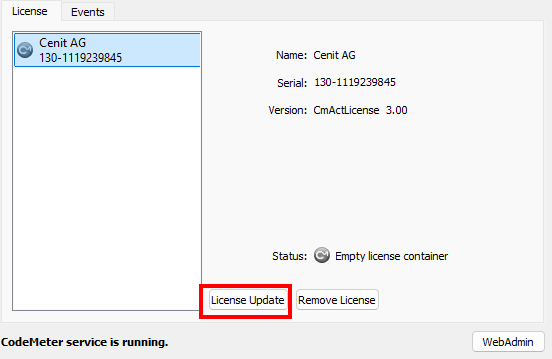
In the CodeMeter Control Center, select the CENIT AG license container and click License Update.
-
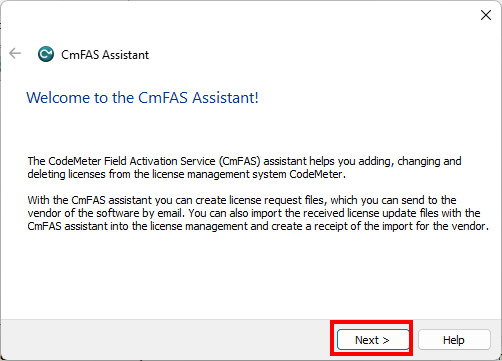
The CmFAS Assistant opens. Click Next.
-
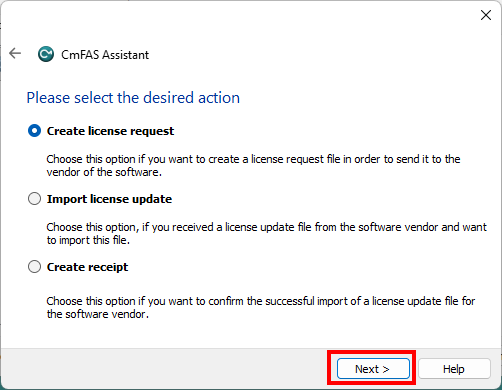
Select Create license request and click Next.
-
Follow the instructions in the CmFAS Assistant to create and save the license request file.
In the WebDepot, the Upload Request step provides the corresponding instructions for the file based activation.
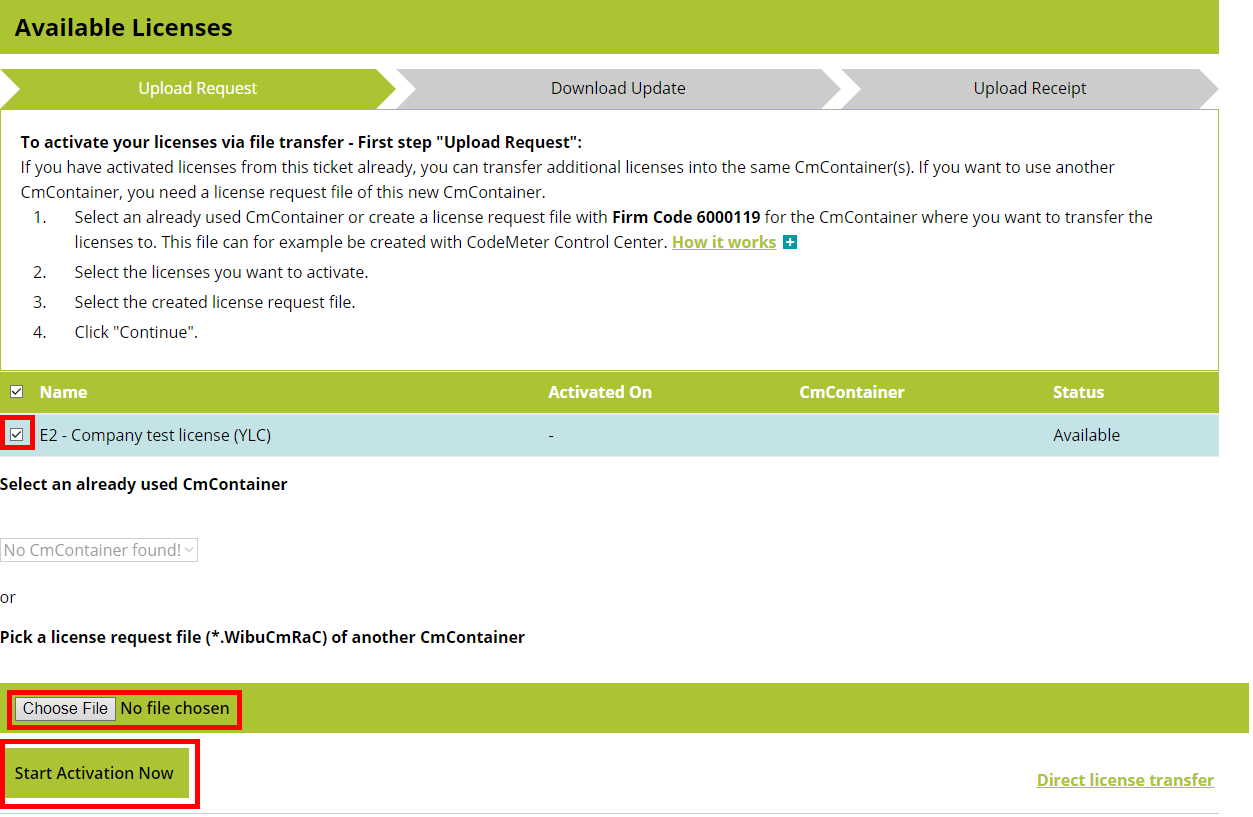
Upload the license request file generated by the CmFAS Assistant.
After the request has been selected and uploaded, click Start Activation Now.
Download and import the license update
After the license request has been uploaded successfully, the Download Update step is displayed.
Download the license update file provided by the WebDepot.
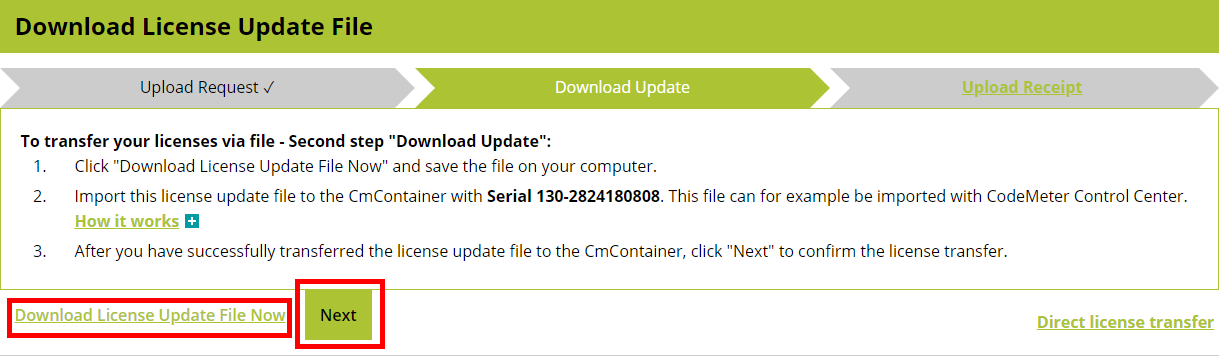
To import the downloaded license update:
-
Open the CodeMeter Control Center.
-
Select the corresponding CENIT AG license container.
-
Click License Update.
-
In the CmFAS Assistant, click Next.
-
Select Import license update and click Next.
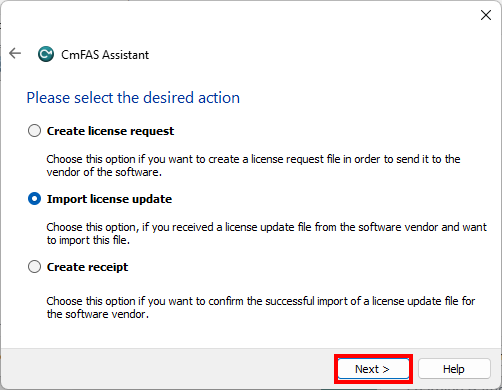
-
Select the license update file downloaded from the WebDepot.
-
Follow the instructions in the assistant to complete the import.
The license update is imported into the selected CodeMeter license container.
Return to the WebDepot and click Next.
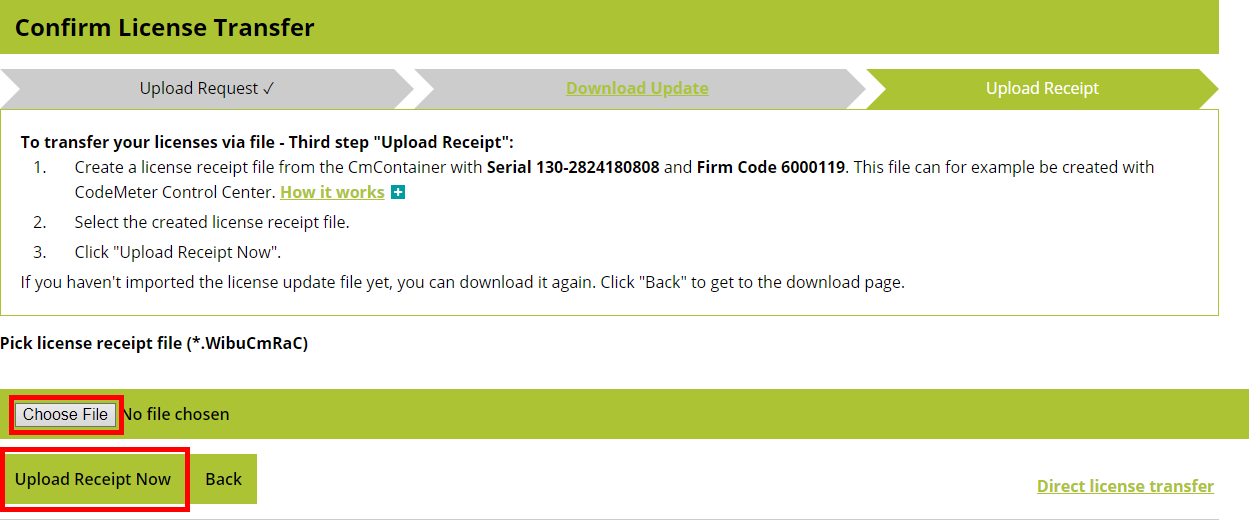
Create and upload a receipt
The final step is to confirm that the license update was successfully imported.
To create the receipt:
-
Open the CodeMeter Control Center.
-
Select the corresponding CENIT AG license container.
-
Click License Update.
-
In the CmFAS Assistant, click Next.
-
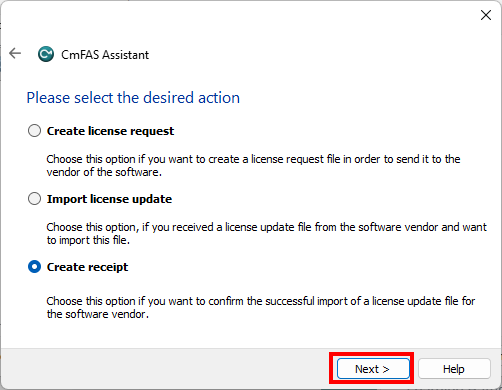
Select Create receipt and click Next.
-
Follow the instructions to create and save the receipt file.
Return to the Upload Receipt step in the WebDepot and upload the generated receipt file.
After the receipt has been uploaded successfully, a confirmation is displayed.

Lizenzübersicht
After the available license has been successfully activated, the license overview in the WebDepot is updated.

The system is now ready to run FASTSUITE Edition 2.
To update or renew a license, follow the corresponding activation procedure again.
Konfigurieren Sie den Lizenzserver
Im CodeMeter Control Center drücken Sie die WebAdmin-Taste. Dadurch wird die Verwaltung in Ihrem Standardbrowser geöffnet.
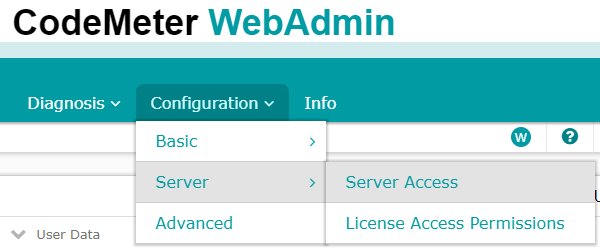
Gehen Sie zum Menü Konfiguration - Server - Serverzugriff.
Enable den Netzserver und drücken Sie die Apply-Taste, um dies zu bestätigen.
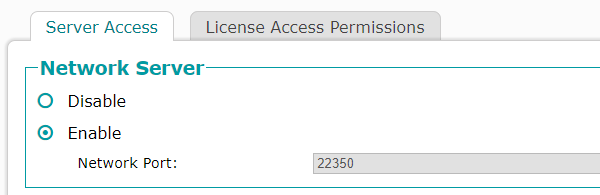
Der Server ist nun bereit, das Lizenzpaket zu verteilen.
Konfigurieren Sie den Lizenzclient
Öffnen Sie auf jedem Client das CodeMeter Control Center und drücken Sie die WebAdmin-Taste. Dadurch wird die Verwaltung in Ihrem Standardbrowser geöffnet.
Gehen Sie zum Menü Konfiguration - Basis - Server-Suchliste.
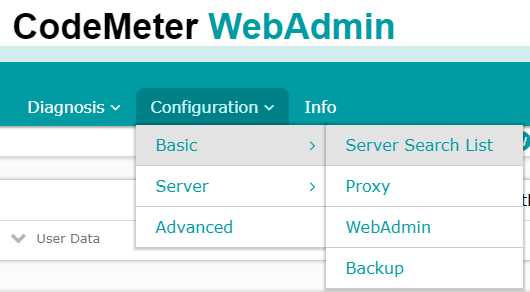
Add den Namen des Lizenzservers ein und bestätigen Sie ihn.
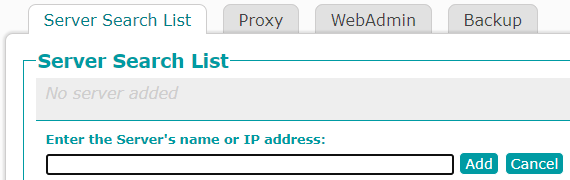
Unten links in der WebAdmin wird normalerweise localhost als aktueller Server angezeigt. Der definierte Servername sollte in der Serverliste erscheinen, wenn Sie darauf klicken.

Der Client ist nun bereit, eine Lizenz vom Server anzufordern.