Installation einer lokalen Lizenz
Installation von Wibu CodeMeter
After the Wibu CodeMeter Runtime software has been downloaded, it can be installed. A default installation is sufficient.
A guide to assist with the installation can be downloaded from the Wibu website.

CodeMeter Installationsanleitung
After the software has been successfully installed, the CodeMeter Control Center icon appears in the Windows taskbar.
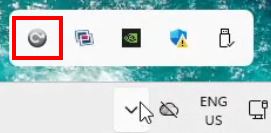
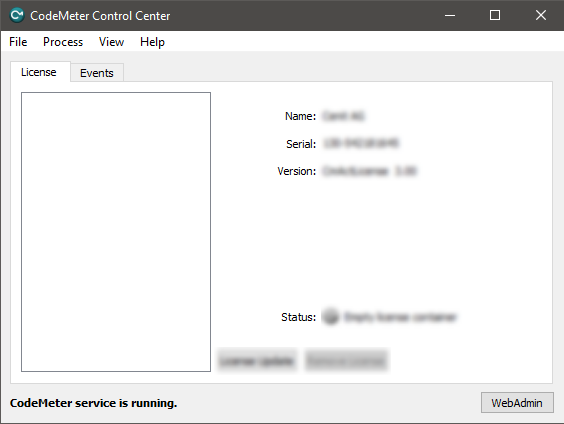
The CodeMeter Control Center can be opened from this icon or from the Windows Start menu. It opens with a panel similar to the one shown below.
Lizenzvorbereitung
If you have received a license dongle, plug the dongle into a USB port of the workstation. It is pre-configured and ready for use. The following license preparation steps can be skipped. Continue with License request and activation.
CodeMeter uses so-called containers, which contain the licensed vendor products. The FASTSUITE container Cenit_AG.WibuCmLif must be downloaded from the CENIT download portal if it has not been received by email.
CENIT download portal
After downloading the container file, the license preparation can be started.
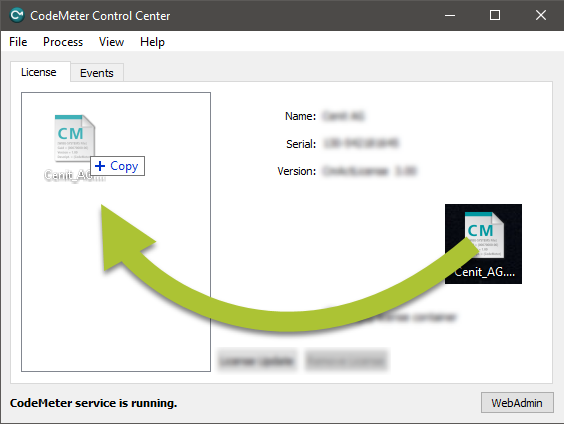
Select the file from the download location, drag it into the CodeMeter Control Center, and drop it in the container area.
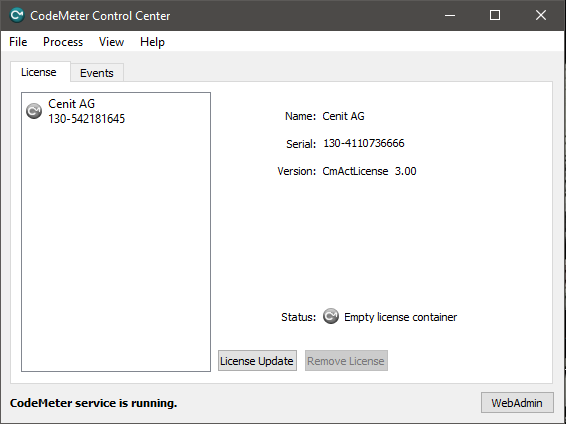
The container is imported. After a successful import, the result should look similar to the example below.
Lizenzanforderung und Aktivierung
After the license container has been prepared, the license can be activated through the FASTSUITE WebDepot.
CENIT WebDepot
The WebDepot login page opens.
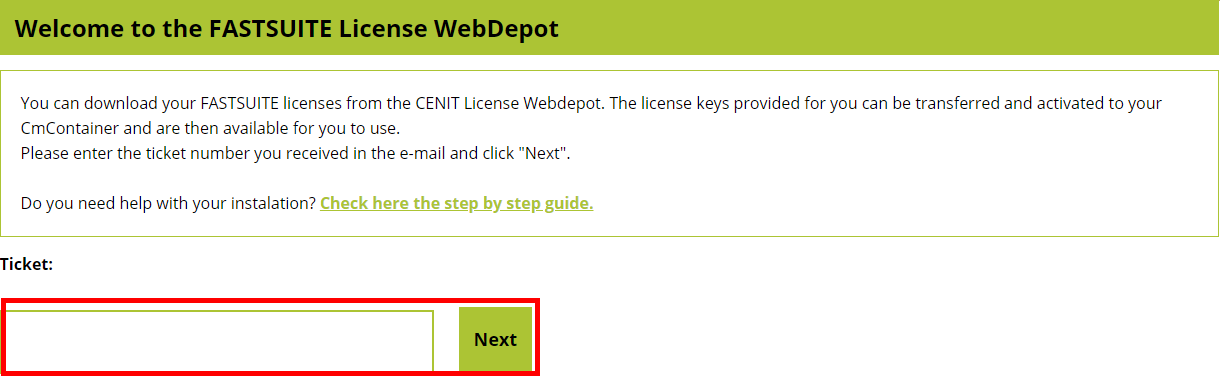
Enter the ticket number received by email and click Next.
A list of all licenses included in the ticket is displayed.

Click Activate licenses to continue.
On the next page, select the target for the license. The license can be installed on a dongle, which can be used on different workstations, or in a local license container on a dedicated workstation.
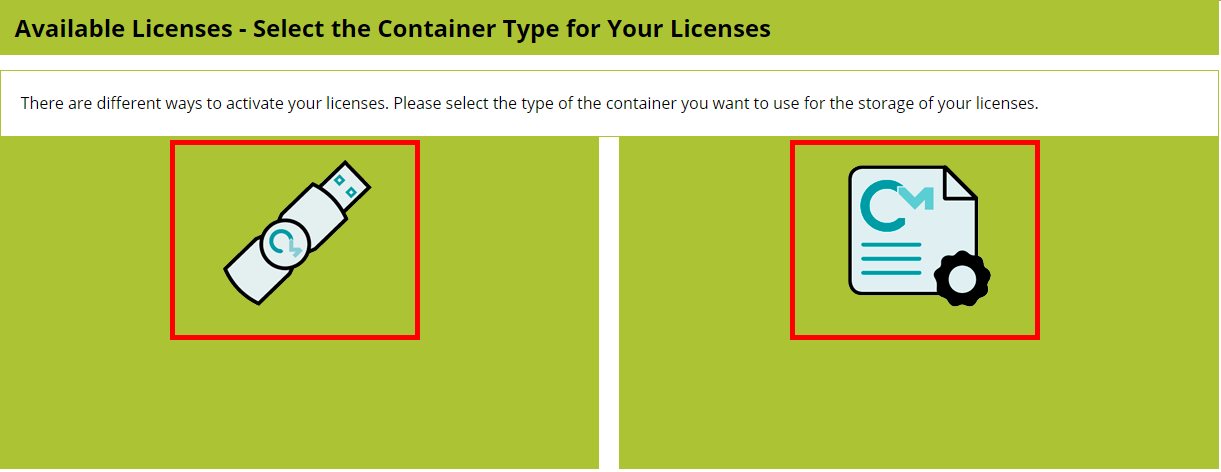
Select the required license target.
The license can then be activated using one of the following methods:
- Online installation — the default and recommended workflow.
- File based license transfer — an optional workflow for manually exchanging the required license files.
A) Online-Installation
Online installation is the default activation method provided by the WebDepot. The license is transferred and activated automatically without manually exchanging license request and update files.
To use online installation, verify that the CENIT WebDepot is configured as a Trusted WebSocket Origin in CodeMeter WebAdmin.
In the CodeMeter Control Center, click WebAdmin. The administration interface opens in your default browser.

Go to Configuration > Advanced > Trusted WebSocket Origins.
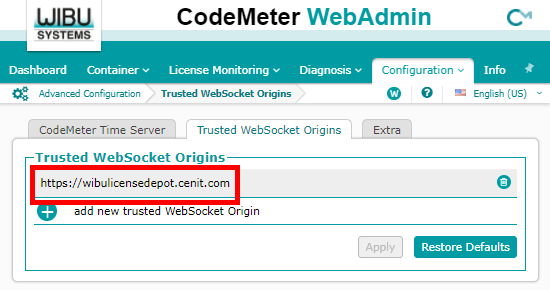
Verify that https://wibulicensedepot.cenit.com is included in the list of Trusted WebSocket
Origins. If the WebDepot address is not listed, add it before continuing. Otherwise, online
activation is not possible.
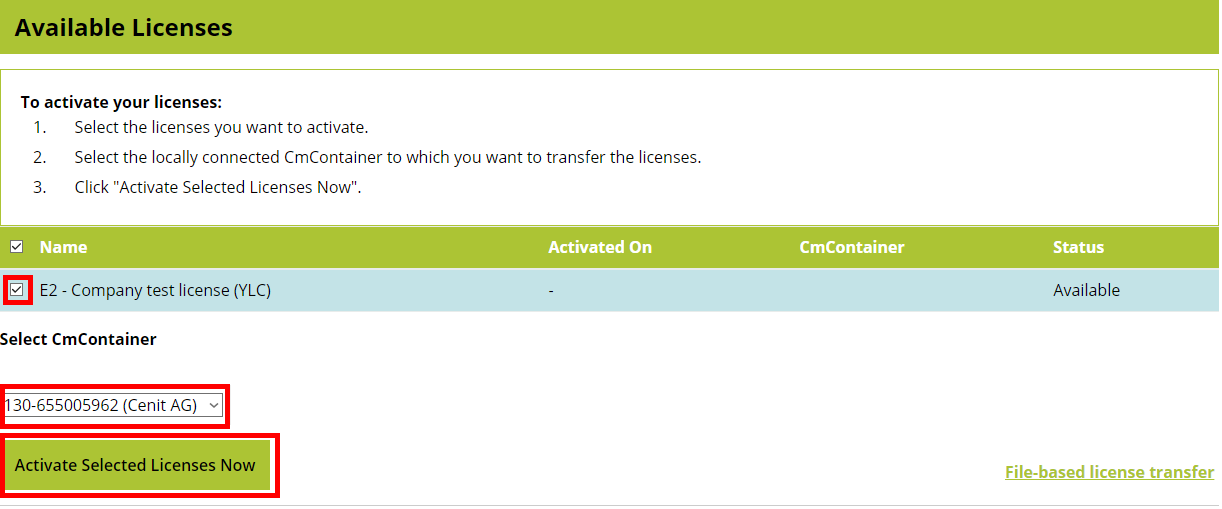
Return to the WebDepot. An overview of the available licenses is displayed.
Follow the instructions on the page to install and activate the license.
B) Optional: File based license transfer
File based license transfer is an optional alternative to online installation. Use this workflow when the license activation needs to be performed manually by exchanging license files between CodeMeter and the CENIT WebDepot.
The file based license transfer consists of three actions:
- Create and upload a license request. — Generate the request file in CmFAS Assistant and upload it to the WebDepot.
- Download and import the license update. — Download the update from the WebDepot and import it into the CodeMeter container.
- Create and upload a receipt. — Create a receipt confirming the import and upload it to the WebDepot.
Create and upload a license request
To create a license request:
-
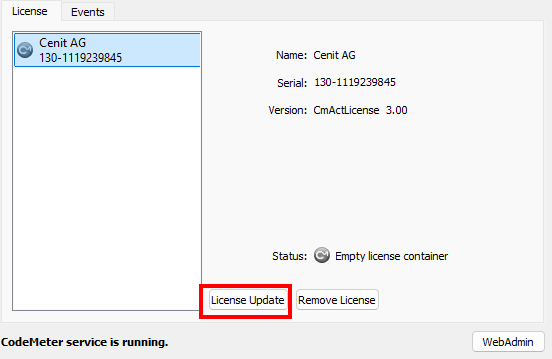
In the CodeMeter Control Center, select the CENIT AG license container and click License Update.
-
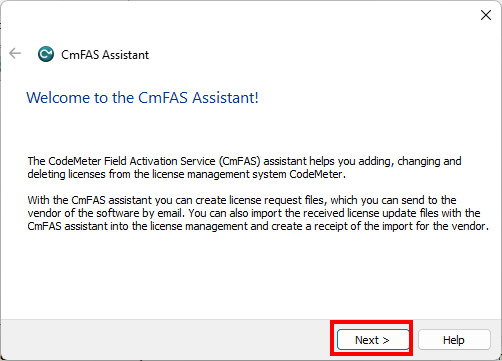
The CmFAS Assistant opens. Click Next.
-
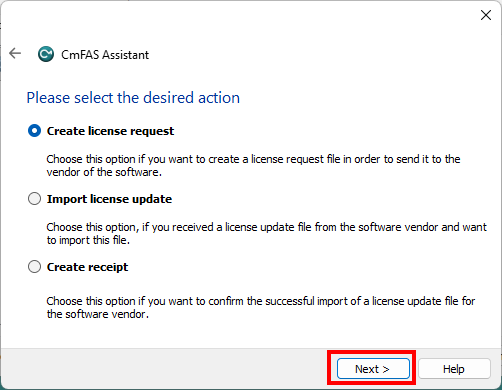
Select Create license request and click Next.
-
Follow the instructions in the CmFAS Assistant to create and save the license request file.
In the WebDepot, the Upload Request step provides the corresponding instructions for the file based activation.
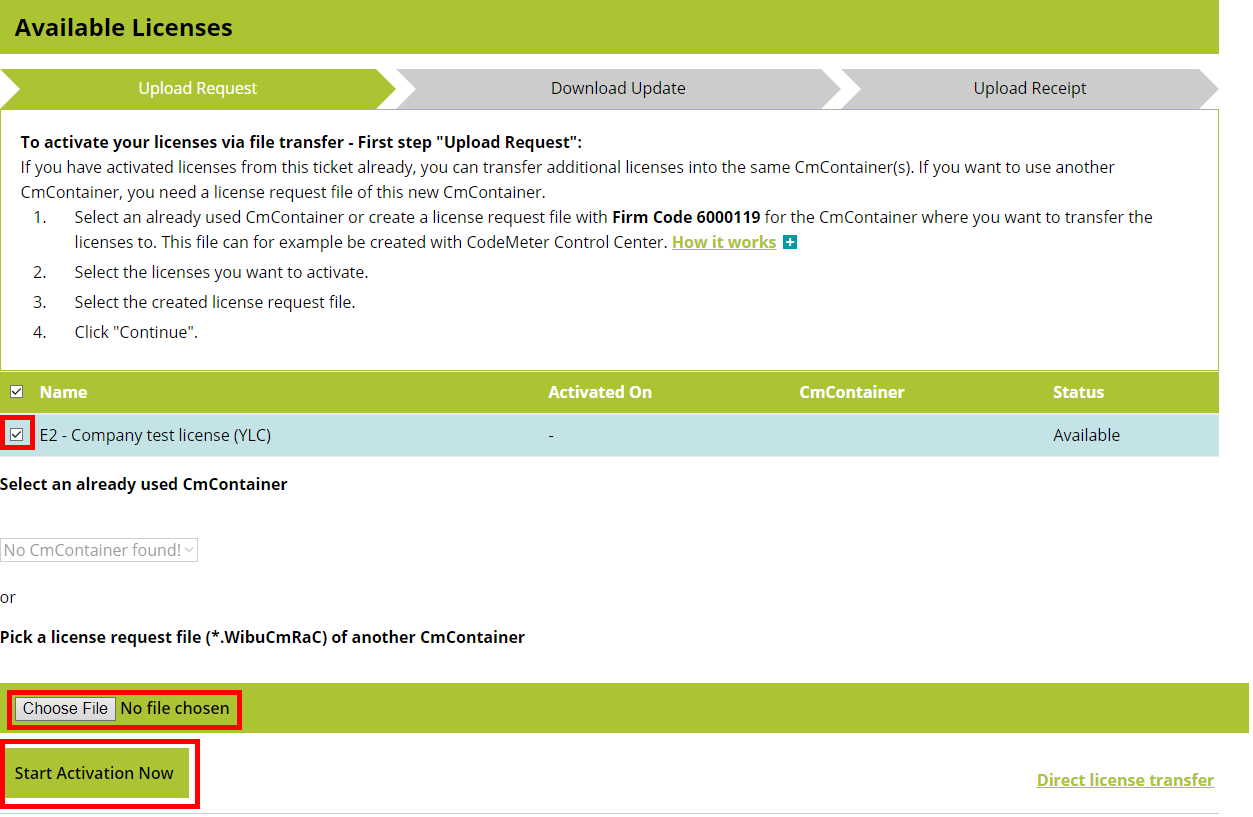
Upload the license request file generated by the CmFAS Assistant.
After the request has been selected and uploaded, click Start Activation Now.
Download and import the license update
After the license request has been uploaded successfully, the Download Update step is displayed.
Download the license update file provided by the WebDepot.
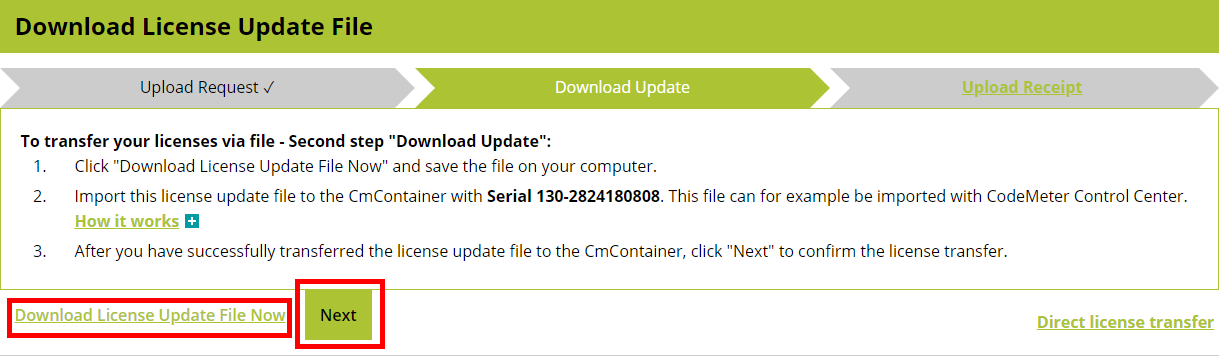
To import the downloaded license update:
-
Open the CodeMeter Control Center.
-
Select the corresponding CENIT AG license container.
-
Click License Update.
-
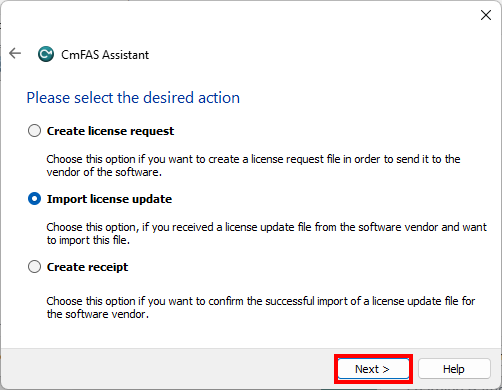
In the CmFAS Assistant, click Next.
-
Select Import license update and click Next.
-
Select the license update file downloaded from the WebDepot.
-
Follow the instructions in the assistant to complete the import.
The license update is imported into the selected CodeMeter license container.
Return to the WebDepot and click Next.
Create and upload a receipt
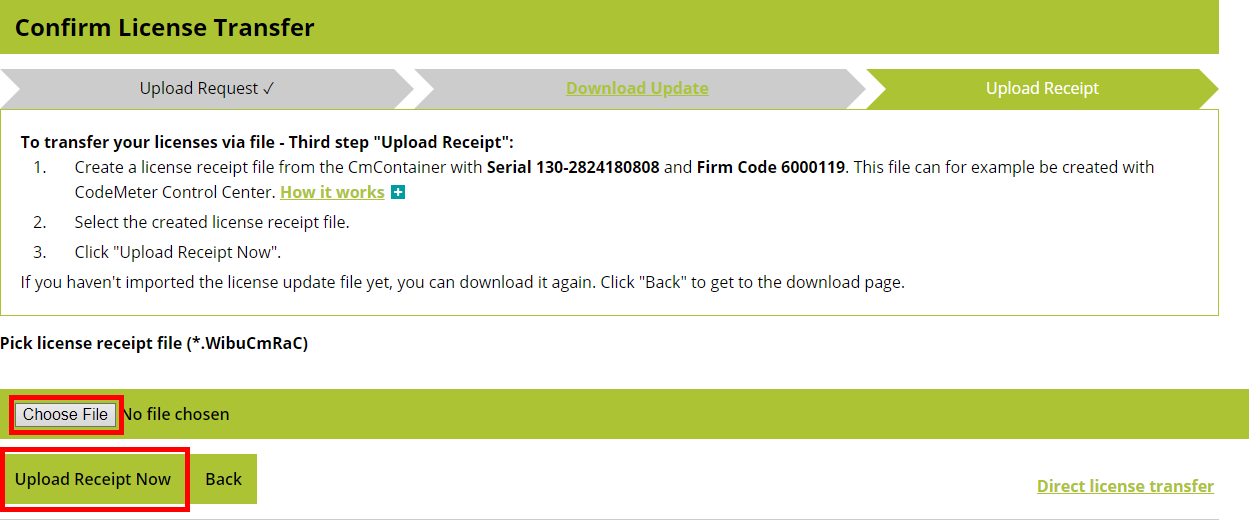
The final step is to confirm that the license update was successfully imported.
To create the receipt:
-
Open the CodeMeter Control Center.
-
Select the corresponding CENIT AG license container.
-
Click License Update.
-
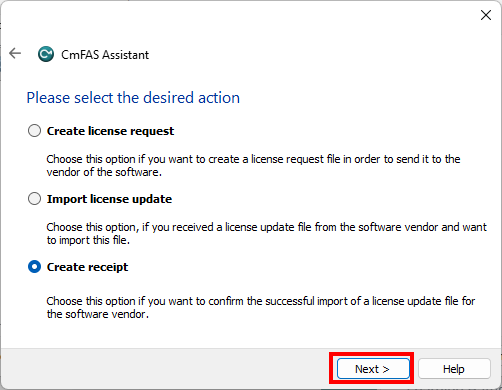
In the CmFAS Assistant, click Next.
-
Select Create receipt and click Next.
-
Follow the instructions to create and save the receipt file.
Return to the Upload Receipt step in the WebDepot and upload the generated receipt file.
After the receipt has been uploaded successfully, a confirmation is displayed.

Lizenzübersicht
After the available license has been successfully activated, the license overview in the WebDepot is updated.

The system is now ready to run FASTSUITE Edition 2.
To update or renew a license, follow the corresponding activation procedure again.