Automatic welding path optimization
Purpose
Learn to use some features to automate the programming.
Load the project Arcwelding_BasicProgrammed.cendoc from the Projects folder of this tutorial library.
Steps
1. Analyze incidents
1.1 Open the Toolpath dashboard and verify incidents
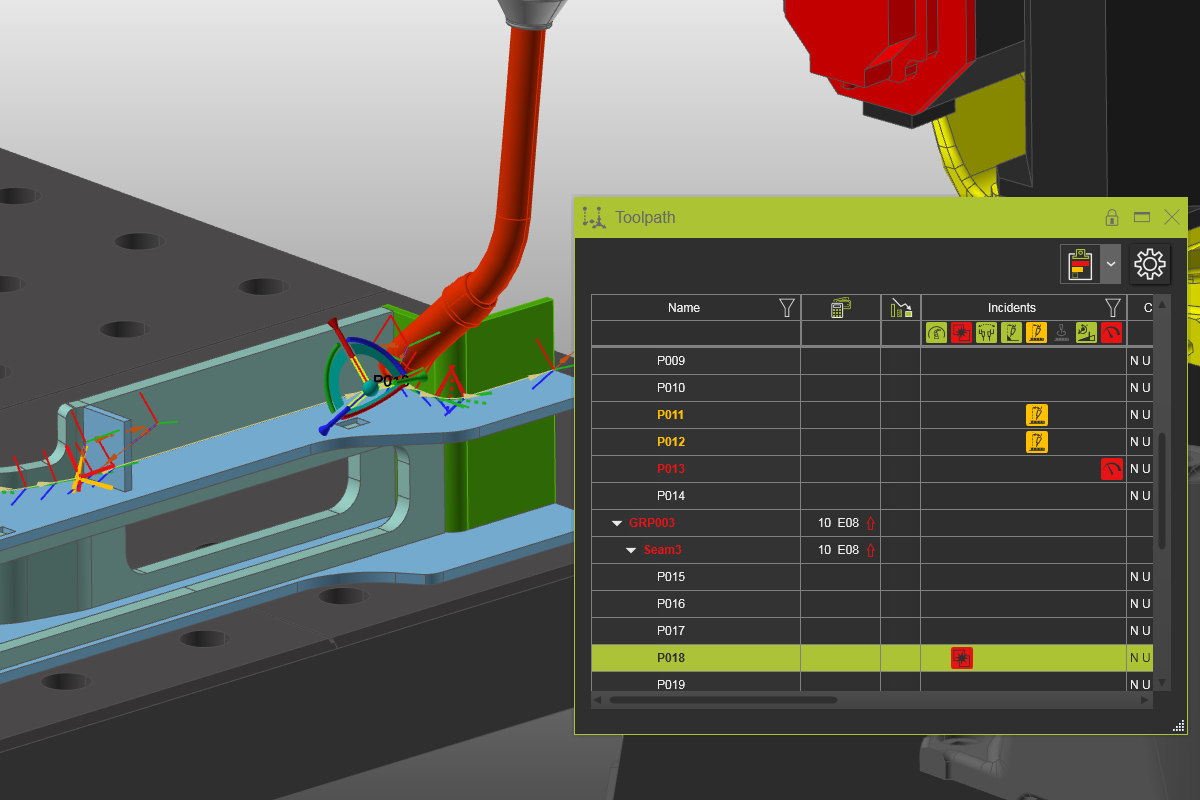
Open the Toolpath dashboard and verify that all incidents are being displayed.
Toolpath dashboard
1.2 Inspect incident pop-ups
Select the Create and edit events command. Hover over the incident-colored welding path elements. A small pop-up window appears to show the incident.
Toolpath incidents
2. Automatic toolpath optimization
2.1 Configure the optimization attributes
Open the Active program dashboard and pick the Toolpath quality tab. When not visible, make sure to have selected the top-level program in the workflow diagram. The Variation space container displays all toolpath attributes that can be modified in variations when running the automatic optimization. The Optimization control container displays all attributes and parameters that can be set as control criteria to run and stop the optimization. Set the Quality cutback value to 10 as a balance of a good result to be reached with acceptable computation time.
Automatic optimization attributes
![]()
![]()
2.2 Execute the automatic toolpath optimization
Re-open the Toolpath dashboard. Take notice of the program costs — a value to express the impact of the quality criteria on the costs to process that program. Then on the program, execute the Automatic toolpath optimization command. A progress window appears.
Automatic toolpath optimization
2.3 Review the optimization result
When finished, a report window appears with the result of the optimization. The Toolpath dashboard has been updated on the fly. Have a look at the results.
Automatic toolpath optimization