Modify the welding path
Purpose
In this paragraph we will modify the welding path, re-sequencing and adding extra motions and copying operations.
The welding path properties are being modified.
Steps
1. Active program
1.1 Open the Active Program dashboard
Open the Active Program dashboard. The dashboard can be re-sized and undocked to best fit the screen or needs.
Active program dashboard
1.2 Merge and unmerge operations
Expand an operation group to see the included operations. Pick an operation and then drag and drop it into another group. The operation will be merged into the second group. If the previous group has only one single operation, it will be automatically deleted. To unmerge an operation, simply drag it outside of the group to create a new operation group.
Merging operations into one group can be very useful when you want to modify certain attributes for these operations in a single action.
Operation groups
1.3 Change operation sequence
Select the last operation group and drag and drop it before the first group. This will change the program sequence. Play the simulation to view the result.
Operation sequence
2. Teaching
2.1 Insert an operation from a home position
Change to Program toolpath. Then right click on the robot and start the Home position command. From the list of predefined home positions of the robot, select the required one. For that position teach and insert an operation.
Home position
2.2 Rename an operation group
If not open already, open the Active program dashboard. Select the newly inserted operation group and click on its name. It changes to edit mode. Change the name and close it with either the Enter key or by picking somewhere outside the name.
Rename operation group
2.3 Copy operation groups and operations
To duplicate, select the operation group. While holding the Ctrl key, drag the group and drop it at the required location in the program. Duplicating single operations works the same way.
Copy an operation
3. Collision detection
To run collision detection between the moving manufacturing equipment and the workpiece on the table, first define which objects are going to be analyzed against each other. In the paragraph Set up the project this collision preparation is taught and shown.
3.1 Enable collision detection
In the simulation bar enable Turn on collision. Then run a simulation. When bodies collide they will highlight. For a nicer visualization you may hide the welding path temporarily in the Display filters.
Enable collision detection
3.2 Pause simulation on collision
In the simulation bar open the Simulation settings. Open the Collision container and enable Pause on collision. Then run another simulation and watch that it stops at the first detected collision.
Pause on collision
4. Teach
4.1 Configure automatic toolpath modification
Perhaps you always want to confirm any modification you make to the welding seam or welding operation. But it is also possible to skip that manual step. To apply the changes on the fly, verify the Settings for offline programming. Check that the option Apply toolpath modification has been set to Automatic. For the purpose of this section to focus on the modification itself, the automatic update of the welding path will be applied.
OLP settings
4.2 Insert welding path positions
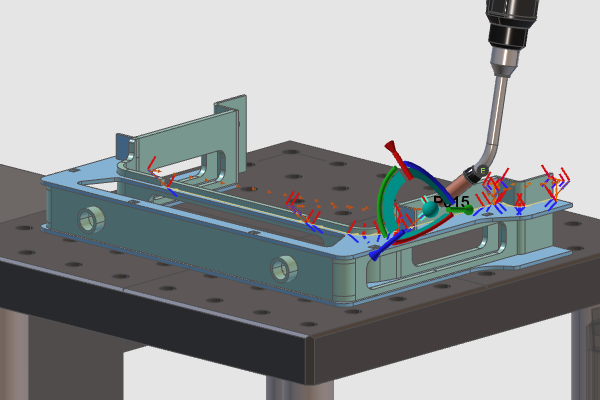
Change to Events and teach. Pick the first welding path element of the third operation and drag the teach manipulator to a safe overhead position. Right click on the center of the manipulator and select the Insert point before command. An I-symbol appears at the new element to indicate its manually inserted status. Make sure you are working in the 3D space, not being active in an opened dashboard. Then use the keyboard to navigate to the next element and repeat to insert a new welding path element before the selected one.
Insert welding path position
4.3 Modify a welding path position with the manipulator
Select a welding path element and use the teach manipulator to change its position. An M-symbol appears at the element to indicate its changed position.
Modify welding path position
4.4 Modify position using relative coordinates
Select a welding path element and click on the center of the teach manipulator. A window will pop up with the coordinates of the manipulator. Select the Relative to initial position option and insert a value for the X-direction. Confirm the movement with the Enter key. Closing the window terminates the workflow. This methodology is useful when moving a target with known dimensions.
Modify welding path position
4.5 Remove a welding path modification
When a welding path element has been modified it gets an M-symbol next to it in the 3D space. To remove the modification, right click on that symbol and execute the Remove command. The element returns to its original position.
Remove welding path modification
4.6 Modify values in the Teach dashboard
Select a welding path element and then open the Teach dashboard. Change the value of the X direction and Rx rotation and press the Enter key to apply the change. The highlighted hand below the rotation values indicates the taught change.
Teach panel
4.7 Remove modifications from the Teach dashboard
Click on the highlighted hand to remove the modification of the rotation. In the Teach dashboard it is possible to remove positional modifications on a welding path element by pressing the corresponding highlighted hand symbols.
Teach panel
4.8 Achieve a collision-free simulation
With the above shown functionality it should be possible to modify the operations in such a way to be able to run a full collision-free simulation.
Teach panel
Next Step
→ Download the Welding Program