Welding seam definition
Purpose
Learn to extend the seam weld process geometry with process-specific information. In combination with the process tables, the controller can assign the specified procedure and process parameters to the welding operation.
Load the project Arcwelding_MultiTeach.cendoc from the Projects folder of this tutorial library.
Steps
1. Process tables
Process tables are technology-specific tables that include possible process states that the controller forwards to the tool, initiated over event triggers in the OLP program. In Arc Welding, the process table defines additional parameters assigned to seam welding operations.
1.1 Switch to the Controller Builder workbench
Controller Builder workbench

1.2 Open Process tables for Arc Welding
Open the Process table dashboard and select the Arc Welding process.
Process tables dashboard
![]()
1.3 Import the controller process table
In the top-right corner, start the Import command. Pick the file ArcWelding_ControllerTable.csv from the installation directory of the training material. Where needed, modify the parameter values.
Import process table
1.4 Save the updated tables
Do not forget to save the controller with the new or updated tables.
Save controller
2. Seam definition
2.1 Switch back to the OLP workbench
OLP workbench

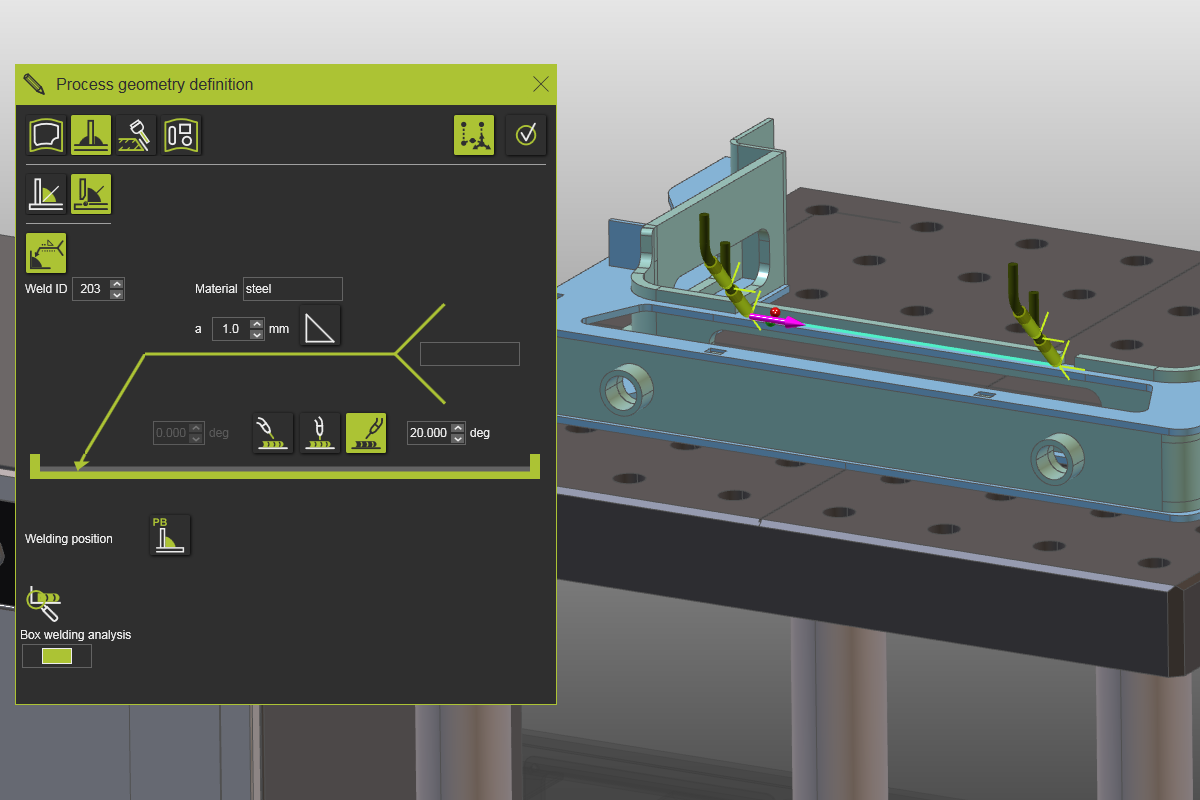
2.2 Open Weld seam properties
In the Welding contour definition, press the Weld seam properties button to display the seam definition parameters.
Weld seam properties
2.3 Define welding values and select the seam
Enter the values for the new welding operation and select the seam on the workpiece to program the operation.
Seam definition parameters
2.4 Verify values in Active program
Open the Active program dashboard. Notice that the values from the seam definition and the controller table have been applied to the operation.
Active program dashboard