Generate the arc welding program
Purpose
The kinematic capabilities of external equipment is used to optimize the programming and to reduce the robot axis motion.
Load the prepared workcell from the previous steps, program the welding operations, and optimize the generated program by interpolating external kinematic axes.
Steps
1. Load the workcell
1.1 Open the existing workcell document.
Open the ArcWelding_ExternalAxis_Base.cendoc workcell file from the Projects folder of this tutorial library. This document contains the complete project setup required for the tasks in this chapter.
Open an existing workcell document
2. Involve the robot rail in the program
2.1 Program the welding path.
Program a welding path
2.2 Modify the rail position for the approach point.
Adjust the rail position so the robot can reach the toolpath approach position.
Modify the rail position
2.3 Modify the rail position for the end point.
Use the Teach dashboard to move the rail so the robot can reach the end position of the welding path.
Modify the rail position
2.4 Simulate the path with rail motion.
Simulate the toolpath
2.5 Adjust toolpath position density.
Change the number of toolpath positions along the welding path. The approximation attributes determine this number.
Update toolpath positions
2.6 Add rail interpolation.
Add interpolation of the rail position along the path to generate smooth rail motion.
Rail interpolation
3. Involve the workpiece positioner in the program
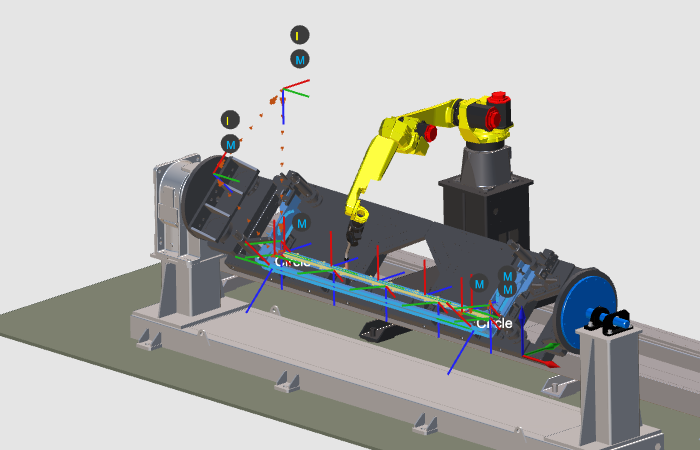
3.1 Program the circular welding path.
Program a welding path
3.2 Modify the positioner angle and simulate.
Use the Teach dashboard to modify the workpiece positioner angle so the robot can reach the welding path approach and end positions, then simulate the result.
Modify the positioner angle
3.3 Add positioner interpolation.
Change the number of toolpath positions using the approximation attributes, then add interpolation of the workpiece positioner along the path for smooth rotation.
Positioner interpolation
4. Simulation
4.1 Simulate the program.
Simulate the program
5. Save the project
5.1 Save the project as a .cendoc document.
Save the project as document