Cutting path quality evaluation
Purpose
Learn how cutting path quality is analyzed and displayed.
Load the project Training_LaserCutFeatures.cendoc from the Projects folder of this tutorial library.
Steps
1. Cutting path quality
1.1 Program an operation
Program an operation on the outer contour of the workpiece.
Program operation
1.2 Open evaluation criteria
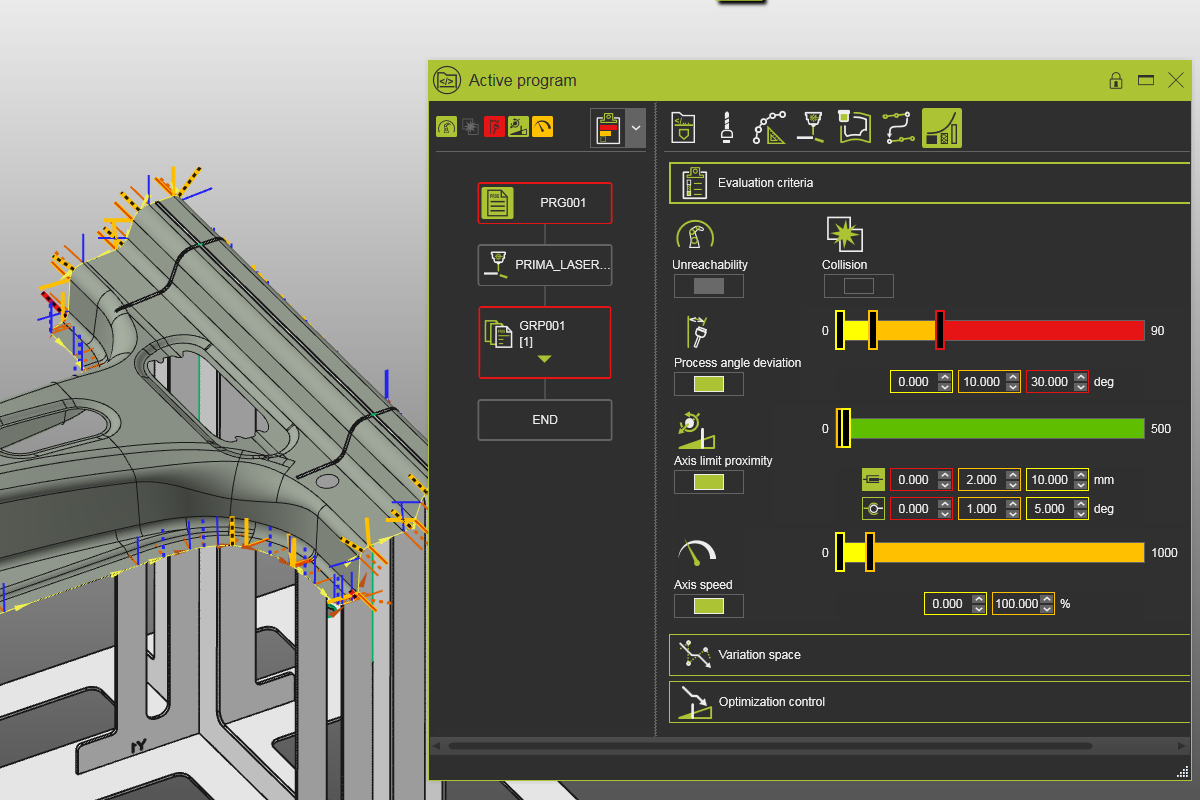
Open the Active program dashboard and select Toolpath quality. Open Evaluation criteria to review all criteria used to measure cutting path quality.
Evaluation criteria
![]()
1.3 Display incidents
Display incidents from the analysis. Toggle criteria in the top row and observe incident status in the icon and program flow chart.
Incident display
![]()
1.4 Enable collision incidents
Switch on collision analysis in the simulation toolbar to display collision incidents.
Collision analysis
1.5 Toggle quality criteria
Enable or disable individual criteria for the cutting path analysis. Reachability is always active and cannot be disabled.
Quality analysis criteria
1.6 Show quality in 3D
In Display filters, open Toolpath and operations and enable quality display on the 3D cutting path.
Display filters
1.7 Set incident display level
Select among three incident display levels, from all incidents to only failures. When multiple incidents exist, the highest-level color is shown.
Incident display levels
1.8 Modify criteria ranges
Adjust Axis speed criterion values with sliders or by entering values. The analysis runs dynamically and reports incidents immediately.
Criteria thresholds
1.9 Review incidents in Toolpath dashboard
Open the Toolpath dashboard to review incidents there as well. Toggling incidents applies in both dashboards. Hover an incident to see details in a tooltip.
Toolpath dashboard incidents
1.10 Save the project
Save your project as .cenprj or .cendoc.
Save project