Modify the arc welding attributes
Purpose
Learn to modify and see the effect of the different welding attributes.
Load the project Arcwelding_ProgramCalculationAttributes.cendoc from the Projects folder of this tutorial library.
Steps
1. Program a welding operation
1.1 Change to Generate process geometry and program the welding operation.
Welding operation
2. Modify the welding attributes
2.1 Modify the tool normal rotation angle
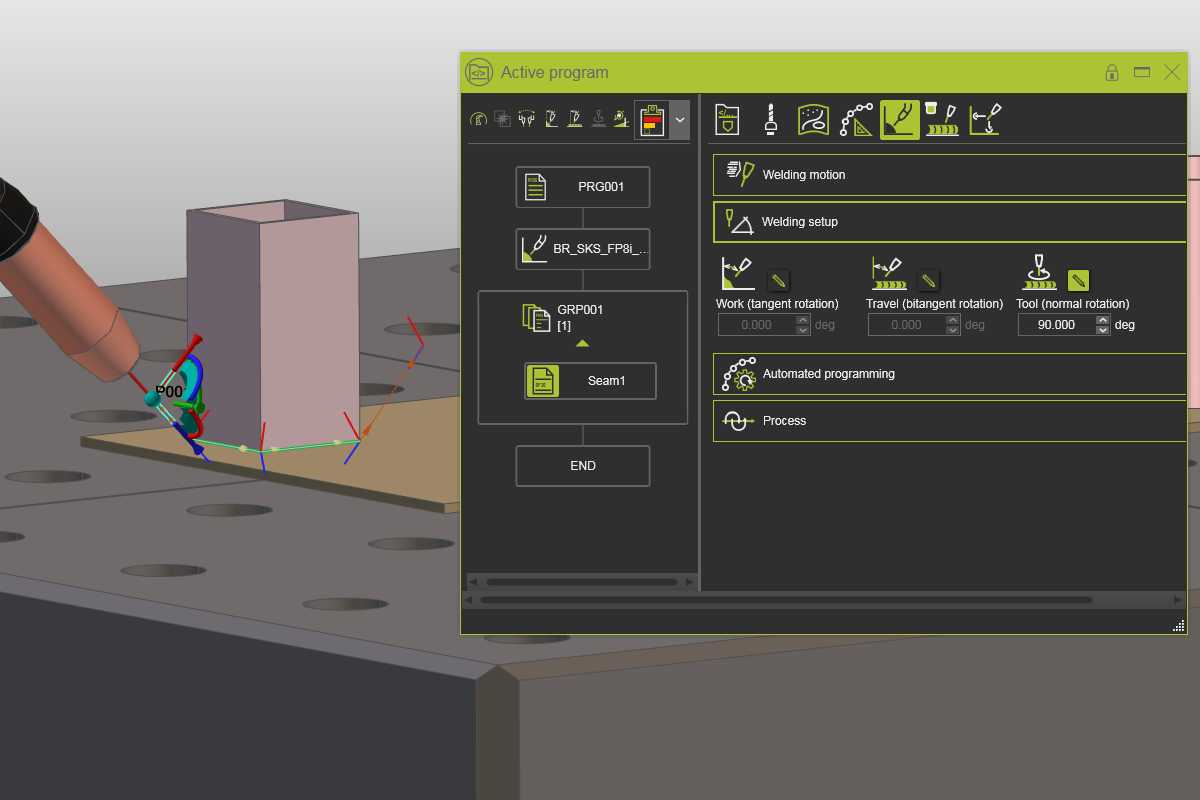
Change to Events and teach and open the Active program dashboard. Select the Technology base tab and open the Welding Setup container. Modify the tool normal rotation angle and press Enter to see the changes.
Welding angles
![]()
2.2 Change the work angle
Change the work angle to -10°. Press Enter to apply the change and run a simulation to see the effect.
Welding angles
![]()
2.3 Change the travel angle
Change the travel angle to -15°. Press Enter to apply the change and run a simulation to see the effect. You may also change the angle to a positive value and run the simulation again.
Welding angles
2.4 Change the welding speed
Reset the work and travel angles. Then open the Welding motion container and change the speed value to 200 mm/s. Run a simulation before and after to see the speed change. The speed attribute only affects the welding speed, not the approach and retract movement.
Welding motion attributes
![]()
2.5 Change the flyby distance
In the same container change the flyby value to 10 mm. Run a simulation before and after to see the accuracy change.
Welding motion attributes
2.6 Change the approach values
Go to the Welding tab and open the Approach container. Change the approach value(s).
Approach attributes