Assemble the workpiece fixture
Purpose
The fixture assembly will be built from the individual components.
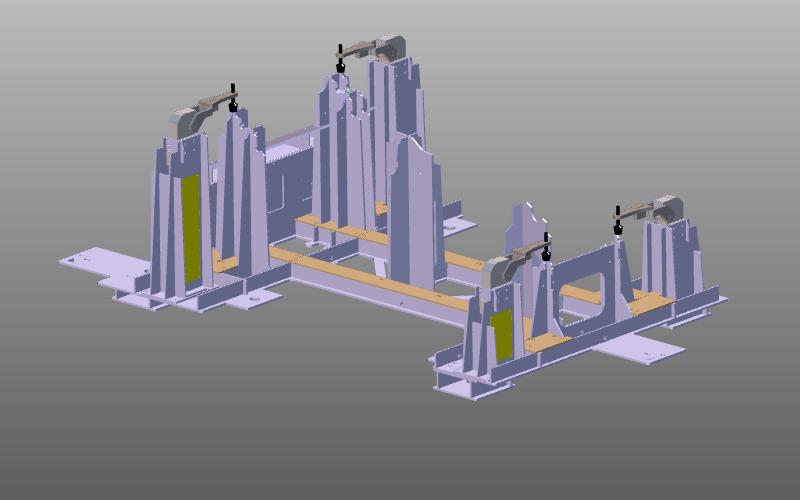
The fixture carrier and a set of clamp instances are positioned to build the complete fixture assembly.
Steps
1. Preparation
Depending on the license package, start in either Layout Builder or Offline Programming.
1.1 Switch to Layout Builder workbench (option A)
Switch to LB workbench

1.2 Switch to Offline Programming workbench (option B)
Switch to OLP workbench

1.3 Create a new empty document (if needed)
If another document is already open in the running session, create a new empty document. Otherwise, skip this step.
Create a new document
2. Build the fixture assembly
2.1 Enable Drag and snap operation mode
After switching workbench, Operation mode is set to Normal by default. In Offline Programming, switch to Drag and snap to move fixture components.
2.2 Load the fixture from library
Load the fixture from the Component library. If the library is not configured, load from file location using Add existing components.
Add from library
2.3 Load a clamp from library
Load one clamp from the Component library.
Add clamp
2.4 Place the clamp on fixture
Drag the clamp toward its mounting position on the fixture. When a yellow connection line appears between clamp and fixture adapter, drop to connect.
Place clamp on fixture
2.5 Copy and position remaining clamps
Copy the clamp with Ctrl+C and paste with Ctrl+V. Position it, then repeat for the remaining clamps.
Copy clamp instances
2.6 Simulate clamp kinematics
Switch to Interaction mode to simulate clamp kinematics. Use Reset to design position to restore clamps.
Interaction mode
3. Save
3.1 Save fixture assembly layout
Save the fixture assembly layout.
Save as layout
Next Step
-> Set up the laser cutting project